前回の続きの記事です👇
今回はお問い合わせフォームをastroで実装します。
お問い合わせフォームで送信された内容がmicroCMSに保存されるようにします。
ページの作成
src/components/Header.astroを編集します
      <HeaderLink href="/">Home</HeaderLink>
      <HeaderLink href="/blog">Blog</HeaderLink>
      <HeaderLink href="/contact">Contact</HeaderLink>
AboutのところをContactに置き換えてください。
(Aboutページはもう使わないので削除でも問題ないです)
src/pages/contact/index.astroを作成します。
---
import BaseHead from "../../components/BaseHead.astro";
import Footer from "../../components/Footer.astro";
import Header from "../../components/Header.astro";
---

<!doctype html>
<html lang="en">
  <head>
    <BaseHead title={"お問い合わせ"} description={"description"} />
  </head>
  <body>
    <Header />
    <main>
      <h1>お問い合わせ</h1>
      <form method="POST">
        <label>
          名前:
          <input type="text" name="name" required />
        </label>
        <label>
          Email:
          <input type="email" name="email" required />
        </label>
        <label>
          内容:
          <textarea name="message" required></textarea>
        </label>
        <button>送信</button>
      </form>
    </main>
    <Footer />
  </body>
</html>
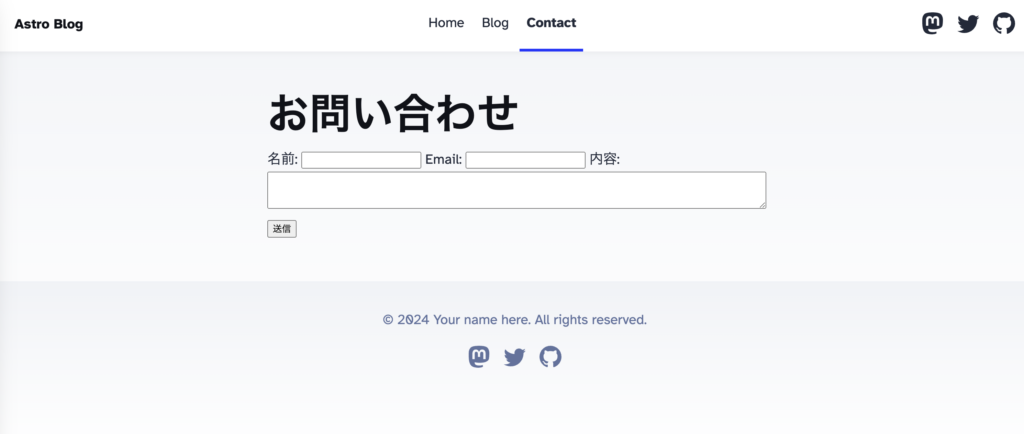
フォームが現れればOKです!
フォーム部分をコンポーネントに切り出しておきます。
src/components/ContactForm.astro
      <form method="POST">
        <label>
          名前:
          <input type="text" name="name" required />
        </label>
        <label>
          Email:
          <input type="email" name="email" required />
        </label>
        <label>
          内容:
          <textarea name="message" required></textarea>
        </label>
        <button>送信</button>
      </form>
src/pages/contact/index.astro
---
import BaseHead from "../../components/BaseHead.astro";
import Footer from "../../components/Footer.astro";
import Header from "../../components/Header.astro";
import ContactForm from "../../components/ContactForm.astro";
---

<!doctype html>
<html lang="en">
  <head>
    <BaseHead title={"お問い合わせ"} description={"description"} />
  </head>
  <body>
    <Header />
    <main>
      <h1>お問い合わせ</h1>
      <ContactForm />
    </main>
    <Footer />
  </body>
</html>
分割して見やすくなりました。
このままではダサいので、スタイルをいい感じに設定します。
<!doctype html>
<html lang="en">
  <head>
    <BaseHead title={"お問い合わせ"} description={"description"} />
  </head>
  <body>
    <Header />
    <main>
      <h1>お問い合わせ</h1>
      <ContactForm />
    </main>
    <Footer />
    <style>
      h1 {
        font-size: 32px;
        text-align: center;
        margin-bottom: 24px;
      }
    </style>
  </body>
</html>
h1の部分のスタイルをbodyの最後に追加しました。
src/pages/contact/index.astro
<style>
  form {
    background: #fff;
    padding: 2em;
    border-radius: 10px;
    box-shadow: 0 4px 8px rgba(0, 0, 0, 0.1);
    max-width: 400px;
    width: 100%;
    margin: auto;
    animation: fadeIn 1s ease-in-out;
  }

  @keyframes fadeIn {
    from {
      opacity: 0;
      transform: translateY(-20px);
    }
    to {
      opacity: 1;
      transform: translateY(0);
    }
  }

  label {
    display: block;
    margin-bottom: 1em;
    font-weight: bold;
    color: #333;
  }

  input[type="text"],
  input[type="email"],
  textarea {
    width: calc(100% - 20px);
    padding: 10px;
    margin-top: 5px;
    border: 1px solid #ccc;
    border-radius: 5px;
    font-size: 1em;
  }

  input[type="text"]:focus,
  input[type="email"]:focus,
  textarea:focus {
    border-color: #007bff;
    outline: none;
    box-shadow: 0 0 5px rgba(0, 123, 255, 0.5);
  }

  textarea {
    height: 100px;
    resize: vertical;
  }

  button {
    display: inline-block;
    width: 100%;
    padding: 10px;
    background-color: #007bff;
    color: white;
    border: none;
    border-radius: 5px;
    font-size: 1em;
    cursor: pointer;
    transition: background-color 0.3s ease;
  }

  button:hover {
    background-color: #0056b3;
  }
</style>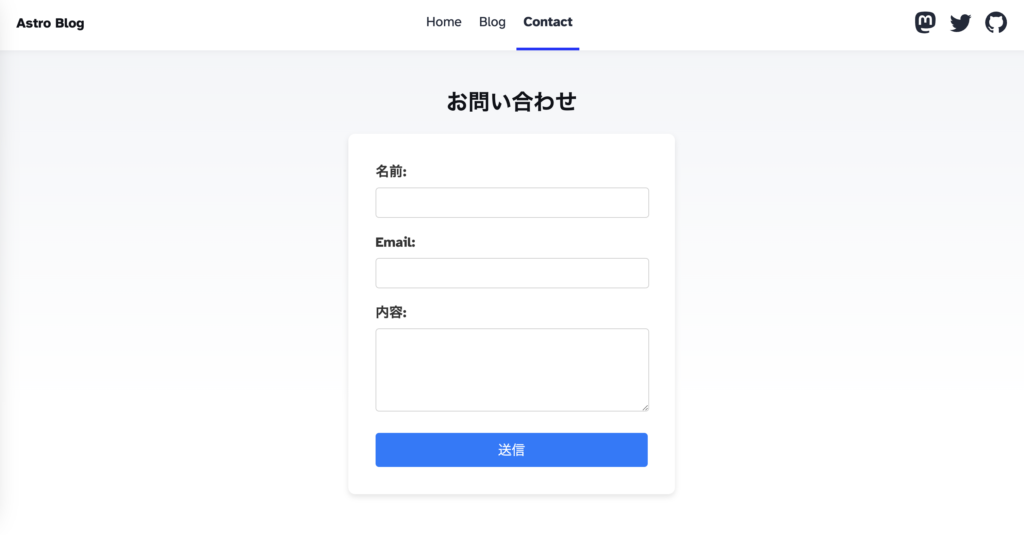
このようになればOKです!
microCMSの設定
お問い合わせを保存するAPIを作っておきます。
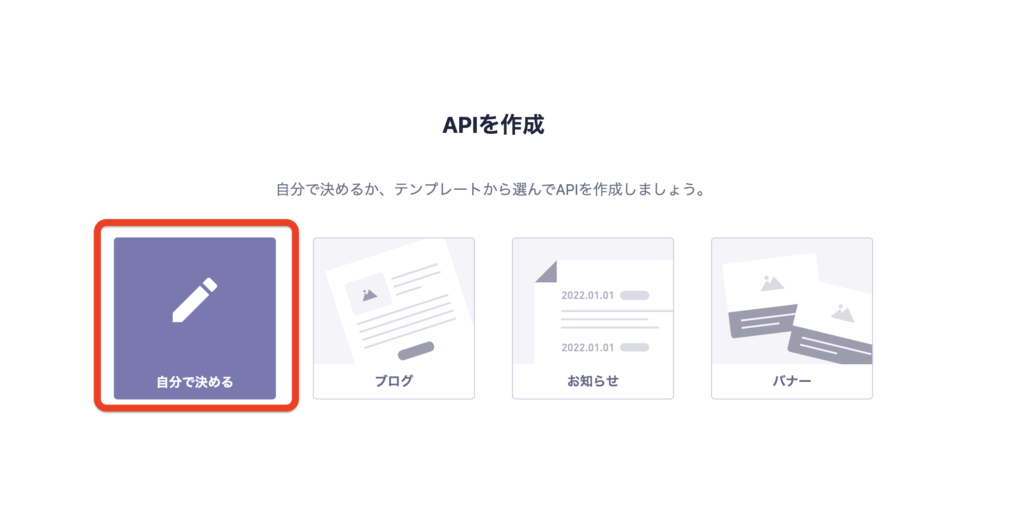
「自分で決める」
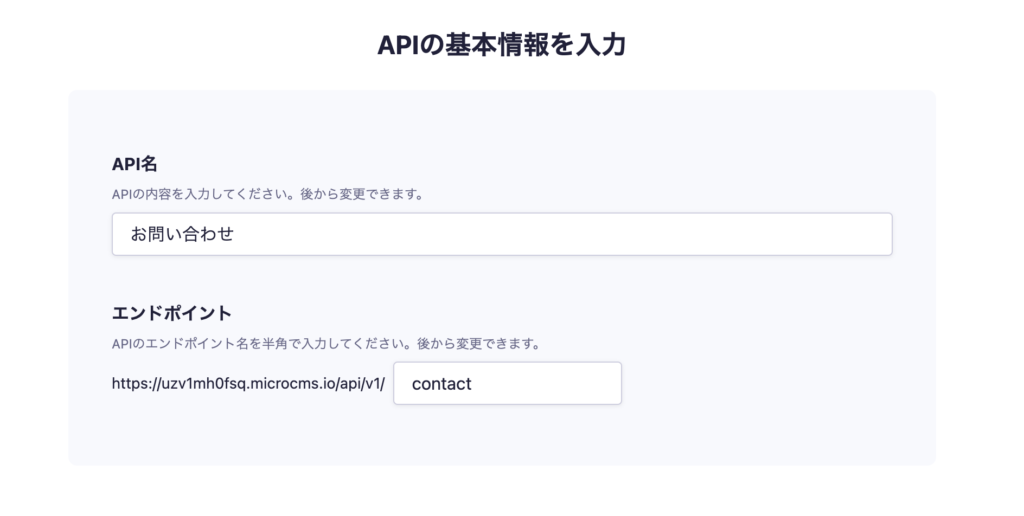
基本情報を埋めます。エンドポイントはcontactにしました。
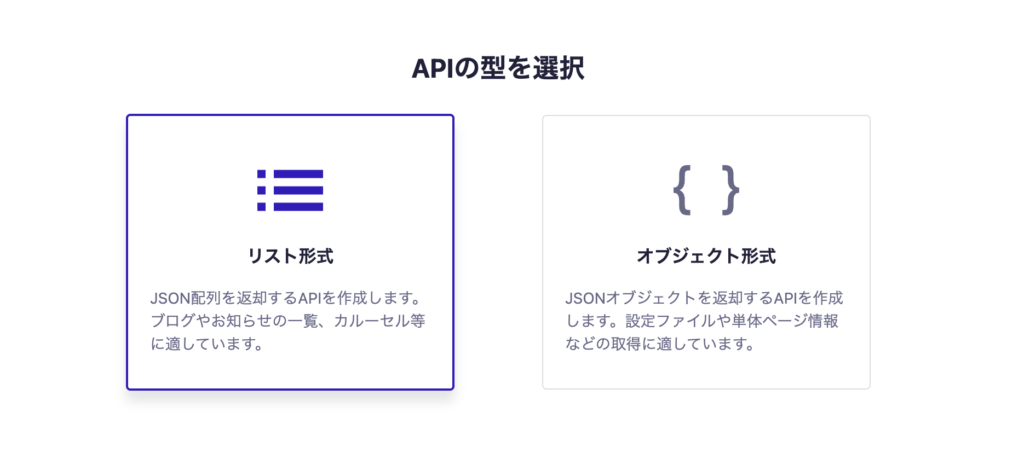
リスト形式を選択。
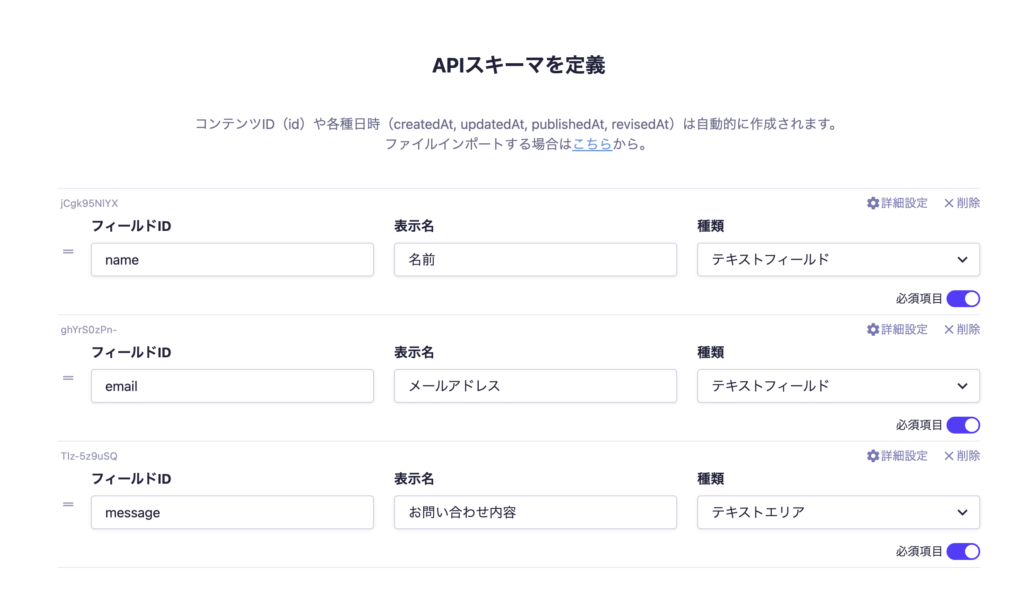
スキーマを、フォームに合わせて定義します。
全部必須項目としておきます。
これで作成し、準備はOKです。
CMSにフォームの内容を送信する
まずフォームを使用してCMSに送信するには、サーバーサイドレンダリング(SSR)が必要です。
astro.config.mjsに、outputの設定を追記します。
export default defineConfig({
  site: "https://example.com",
  integrations: [mdx(), sitemap()],
  output: "hybrid",
});
hybridにすることで、静的生成するページとSSRするページを設定できるようにします。
詳しくはこちら👇
デフォルトでは静的生成になります。
SSRするには、pages配下のファイルに追記します。
export const prerender = false;これで、contactページがSSRモードになります。
次に、フォームで送信した内容をサーバーサイドで受け取ります。
---
if (Astro.request.method === "POST") {
  try {
    const data = await Astro.request.formData();
    const name = data.get("name");
    const email = data.get("email");
    const message = data.get("message");
    console.log(name, email, message);
  } catch (error) {
    if (error instanceof Error) {
      console.error(error.message);
    }
  }
}
---
これで適当に入力して送信してみましょう!

送信した内容が、ターミナルに出力されるはずです。
受け取った内容をmicroCMSに保存してきます!
libs/client.tsに追記します。
export type Contact = {
    name: string;
    email: string;
    message: string;
};

export const postContact = async (data: Contact) => {
    return await client.create({ endpoint: "contact", content: data });
}
エンドポイント「contact」にPOSTする関数を作成しました。
あとはこれを呼び出せばOKです。
import { postContact } from "../../libs/client";

if (Astro.request.method === "POST") {
  try {
    const data = await Astro.request.formData();
    const name = data.get("name")?.toString();
    const email = data.get("email")?.toString();
    const message = data.get("message")?.toString();
    if (!name || !email || !message) {
      throw new Error("名前、Email、内容は必須です");
    }
    const response = await postContact({ name, email, message });
    console.log(response);
  } catch (error) {
    if (error instanceof Error) {
      console.error(error.message);
    }
  }
}
toString()で、string型に変換しています。
それだけだとundefindの可能性もあるので、その場合はエラーを投げるようにしました。
(実際はemailの形式や⚪︎文字以上、などの条件をつけます。今回は簡易的なバリデーションにしています。)
その後、先ほど作成したpostContactを呼び出しています。
この状態で送信してみましょう!

ターミナルのログに、投稿のidが返ってくればOKです!

管理画面側で、お問い合わせ内容が反映されています!
二重送信対策
このままでもフォームとしては機能しますが、送信後にリロードすると同じ内容が再度POSTされてしまいます。
if (Astro.request.method === "POST") {
  try {
    const data = await Astro.request.formData();
    const name = data.get("name")?.toString();
    const email = data.get("email")?.toString();
    const message = data.get("message")?.toString();
    if (!name || !email || !message) {
      throw new Error("名前、Email、内容は必須です");
    }
    await postContact({ name, email, message });
    return Astro.redirect("/contact");
  } catch (error) {
    if (error instanceof Error) {
      console.error(error.message);
    }
  }
}
Astro.redirectで、成功したらcontactにリダイレクトするようにしました。
これで再度POSTが送信されることはなくなるため、リロード対策ができました。
これでお問い合わせフォームは完成となります!
今回はCMSに投稿しましたが、その前後でメールを送信する処理を入れるとさらに実用性が上がりそうですね!
次回はこのブログをデプロイしてみます。
