このチュートリアルでは、Laravel、Inertia.js、Reactを使用して認証付きTodoアプリを作成する方法を詳しく解説します。それでは、早速始めていきましょう。
環境の準備
こちらを参考に、環境構築を行ってください。
次に、breezeをinstallします。
composer require laravel/breeze --dev
php artisan breeze:install
php artisan migrate
npm install
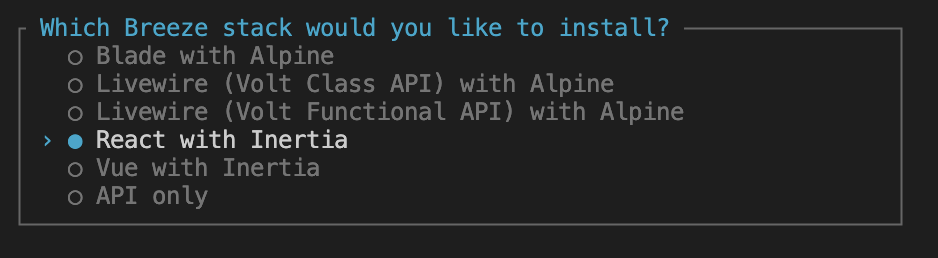
npm run devWhich Breeze stack would you like to install?
React with Inertia
を選択します。
Would you like any optional features?
選択不要です。

Which testing framework do you prefer?
PestかPHPUnitを選べますが、テストは使わないのでどちらでも良いです。
Pestにしておきます。
インストール完了後、
npm run devで起動します。
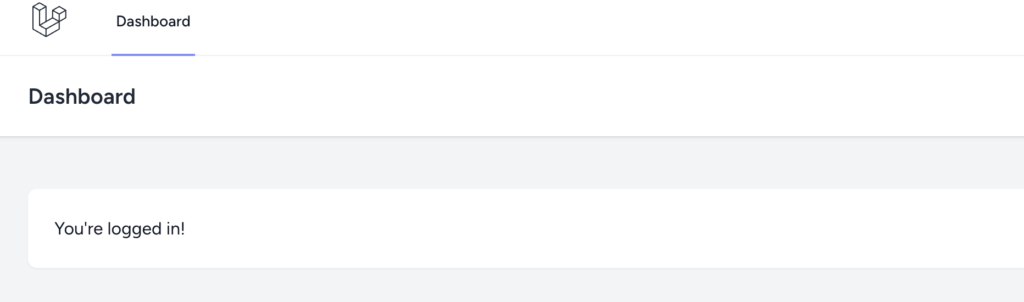
http://localhost/loginがブラウザで見れていればOKです。

ユーザーを適当に登録し、ダッシュボードに遷移することを確認します。
一覧作成
Todoのマイグレーションを作成します。
php artisan make:migration create_todos_table --create=todos<?php
use Illuminate\Database\Migrations\Migration;
use Illuminate\Database\Schema\Blueprint;
use Illuminate\Support\Facades\Schema;
return new class extends Migration
{
/**
* Run the migrations.
*/
public function up(): void
{
Schema::create('todos', function (Blueprint $table) {
$table->id();
$table->string('todo');
$table->foreignId('user_id')->constrained()->onDelete('cascade');
$table->timestamps();
});
}
/**
* Reverse the migrations.
*/
public function down(): void
{
Schema::dropIfExists('todos');
}
};
php artisan migrateモデルを作成します。
php artisan make:model Todo次に、TodoモデルとUserモデルのリレーションを設定します。app/Models/Todo.phpを開き、以下のように修正します。
namespace App\Models;

use Illuminate\Database\Eloquent\Model;

class Todo extends Model
{
    protected $fillable = ['todo', 'user_id'];

    public function user()
    {
        return $this->belongsTo(User::class);
    }
}ユーザーが複数のTodoを持つ関係を設定するために、Userモデルにリレーションを追加します。app/Models/User.phpを開き、以下のように修正します。
namespace App\Models;

 ...略...

class User extends Authenticatable
{
    ...略...

    // 追加
    public function todos()
    {
        return $this->hasMany(Todo::class);
    }
}
コントローラーを作成します。
php artisan make:controller TodoControllerapp/Http/Controllers/TodoController.phpを開き、以下のように実装します。
<?php

namespace App\Http\Controllers;

use App\Models\Todo;
use Illuminate\Http\Request;
use Illuminate\Support\Facades\Auth;
use Inertia\Inertia;

class TodoController extends Controller
{
    public function index()
    {
        $todos = Todo::where('user_id', Auth::id())->get();
        return Inertia::render('Todo', ['todos' => $todos]);
    }
}
フロントエンドの表示には、Inertia::render()を使用します。
Inertia::render(JSコンポーネント名,propsに渡す値の配列)
となります。
作成したコントローラーをルーティングに追加します。routes/web.phpを以下のように設定します。
Route::middleware('auth')->group(function () {
    Route::get('/profile', [ProfileController::class, 'edit'])->name('profile.edit');
    Route::patch('/profile', [ProfileController::class, 'update'])->name('profile.update');
    Route::delete('/profile', [ProfileController::class, 'destroy'])->name('profile.destroy');
    // 追加
    Route::get('/todos', [TodoController::class, 'index'])->name('todos.index');
});
Inertia を使用する場合、アプリケーションのルートはすべてサーバー側で定義されます。つまり、Vue Router や React Router は必要ありません。代わりに、このようにLaravelでルートを定義します。
https://inertiajs.com/routing
Todoアプリに対して5件のTodoを登録するためのシーダーを作成します。
php artisan make:seeder TodoSeederdatabase/seeders/TodoSeeder.phpを開き、以下のように修正します。ここでは、サンプルのTodoを5件生成します。
<?php

namespace Database\Seeders;

use App\Models\Todo;
use App\Models\User;
use Illuminate\Database\Console\Seeds\WithoutModelEvents;
use Illuminate\Database\Seeder;

class TodoSeeder extends Seeder
{
    /**
     * Run the database seeds.
     */
    public function run(): void
    {
        // 現在のユーザーを取得
        $user = User::first(); // ここでは最初のユーザーを取得します。適宜変更してください。

        if ($user) {
            Todo::create(['todo' => '買い物リストを作成する', 'user_id' => $user->id]);
            Todo::create(['todo' => '週末の掃除をする', 'user_id' => $user->id]);
            Todo::create(['todo' => 'プロジェクトのコードレビューを行う', 'user_id' => $user->id]);
            Todo::create(['todo' => '友人とランチの計画を立てる', 'user_id' => $user->id]);
            Todo::create(['todo' => '本を読んで感想を書く', 'user_id' => $user->id]);
        }
    }
}
シーダーを実行するために、database/seeders/DatabaseSeeder.phpを更新します。このファイルでTodoSeederを呼び出します。
namespace Database\Seeders;

use Illuminate\Database\Seeder;

class DatabaseSeeder extends Seeder
{
    public function run()
    {
        $this->call([
            TodoSeeder::class,
        ]);
    }
}
シーダーを実行して、データベースにTodoを登録します。次のコマンドを実行してください。
php artisan db:seedこれでバックエンド側の設定は終わりです!
次にフロント側を作成します。
resources/js/Pages/Todo.jsx
import React from "react";
import TodoForm from "../Components/TodoForm";
import TodoList from "../Components/TodoList";
import { Head } from '@inertiajs/react';
import AuthenticatedLayout from '@/Layouts/AuthenticatedLayout';

const Todo = ({ todos }) => {

    return (
        <AuthenticatedLayout
            header={
                <h2 className="font-semibold text-xl text-gray-800 leading-tight">
                    Todo List
                </h2>
            }
        >
            <Head title="Todo List" />
            <div className="flex flex-col items-center justify-center min-h-screen -mt-40">
                <div className="bg-white shadow-md rounded-lg p-6 w-full max-w-md">
                    <h3 className="text-3xl font-bold text-center mb-4">
                        Todo List
                    </h3>
                    <TodoForm/>
                    <TodoList todos={todos} />
                </div>
            </div>
        </AuthenticatedLayout>
    );
};

export default Todo;
resources/js/Components/TodoList.jsx
import React from 'react';

const TodoList = ({ todos }) => {
    const handelDelete = (id) => {
        if (confirm("本当に削除しますか?")) {
          //
        }
    }
    return (
        <ul className="space-y-2">
            {todos.map((item) => (
                <li key={item.id} className="flex justify-between items-center bg-gray-50 p-3 rounded-md shadow">
                    <span className="text-gray-700">{item.todo}</span>
                    <button
                        className="bg-red-500 text-white p-1 w-12 rounded hover:bg-red-600 transition duration-200"
                        onClick={() => handelDelete(item.id)}
                    >
                        削除
                    </button>
                </li>
            ))}
        </ul>
    );
};

export default TodoList;
resources/js/Components/TodoForm.jsx
import React, { useState } from "react";
import { router, usePage } from "@inertiajs/react";

const TodoForm = () => {
    const [todo, setTodo] = useState("");
    const { errors } = usePage().props;

    const addTodo = (e) => {
        e.preventDefault();
        setTodo("");
    };

    return (
        <form onSubmit={addTodo}>
            <div className="flex mb-2">
                <input
                    type="text"
                    value={todo}
                    onChange={(e) => setTodo(e.target.value)}
                    className="border border-gray-300 p-2 rounded-l-md w-full focus:outline-none focus:ring-2 focus:ring-blue-500"
                    placeholder="新しいTodoを追加"
                    required
                />
                <button className="bg-blue-500 text-white p-2 w-20 rounded-r-md hover:bg-blue-600 transition duration-200">
                    追加
                </button>
            </div>
            {errors.todo && (
                <p className="text-red-500 text-sm mb-2">{errors.todo}</p>
            )}
        </form>
    );
};

export default TodoForm;
これでログインした状態で、
http://localhost/todosにアクセスします。
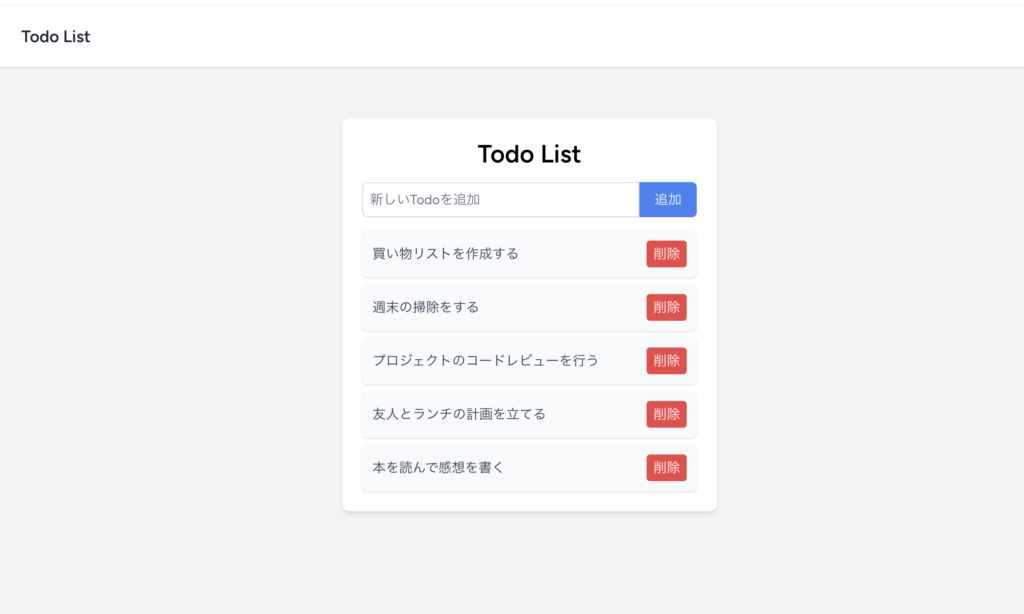
このように表示されればOKです!
新規追加
実装
まずバックエンド側を作成します。
    public function store(Request $request)
    {
        $request->validate([
            'todo' => ['required', 'max:50'],
        ]);

        Todo::create([
            'todo' => $request->todo,
            'user_id' => Auth::id(),
        ]);

        return to_route('todos.index');
    }
バリデーションを設定し、レコードを作成しています。
to_routeメソッドでレコード作成後にリロードさせています。
ルーティングを追加します。
Route::middleware('auth')->group(function () {
    Route::get('/profile', [ProfileController::class, 'edit'])->name('profile.edit');
    Route::patch('/profile', [ProfileController::class, 'update'])->name('profile.update');
    Route::delete('/profile', [ProfileController::class, 'destroy'])->name('profile.destroy');
    Route::get('/todos', [TodoController::class, 'index'])->name('todos.index');
    Route::post('/todos', [TodoController::class, 'store'])->name('todos.store');//追加
});
次にフロント側の設定をします。
すでにUIはできているので、イベントハンドラからPOST送信をすれば良いです。
inertiajsのrouter.postを使用します。
   import { router } from '@inertiajs/react'

    const addTodo = (e) => {
        e.preventDefault();
        // 追加
        router.post("/todos", {
            todo,
        });
        setTodo("");
    };
バリデーションエラー表示
今回はTodoに対して50文字制限を設定しました。
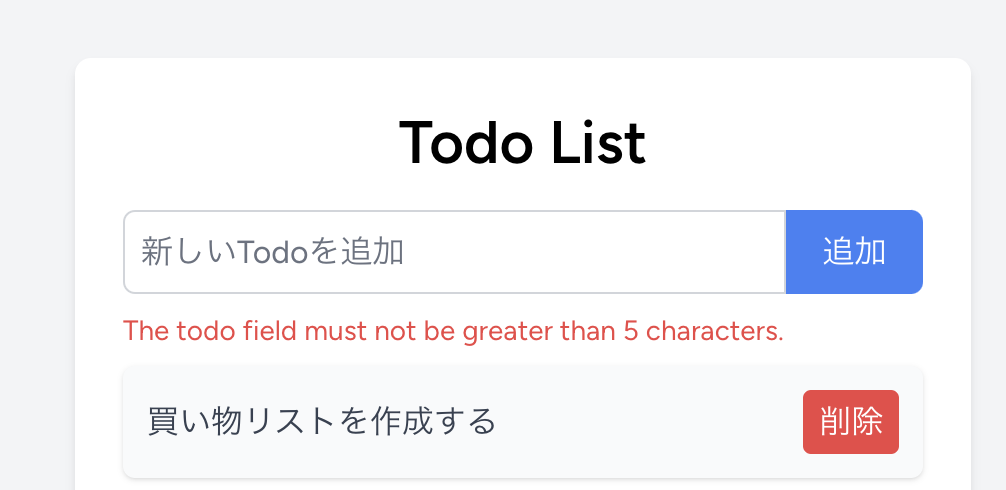
React側はこのように書いています。
import { router, usePage } from "@inertiajs/react";

const { errors } = usePage().props;

...略...
{errors.todo && (
    <p className="text-red-500 text-sm mb-2">{errors.todo}</p>
)}
usePage().propsに、errorsが入ります。
削除
コントローラーにメソッドを追加します。
    public function destroy(Todo $todo)
    {
        $todo->delete();
        return to_route('todos.index');
    }
ルーティングを設定します。
Route::delete('/todos/{todo}', [TodoController::class, 'destroy'])->name('todos.destroy');次にフロント側の設定をします。
    const handelDelete = (id) => {
        if (confirm("本当に削除しますか?")) {
            router.delete(`/todos/${id}`); // 追記
        }
    }
これで完成しました!